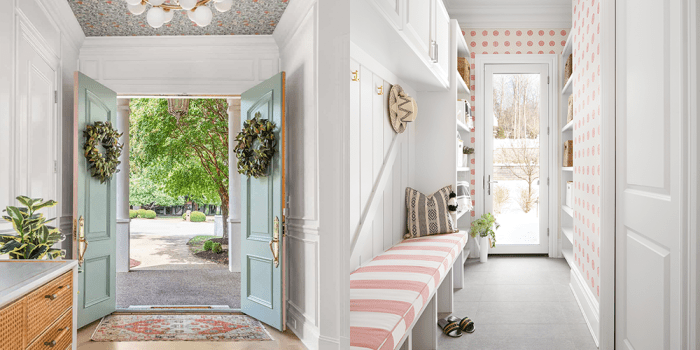
Transform your entryway into a welcoming haven that reflects the changing seasons. From the vibrant hues of spring to the cozy warmth of winter, seasonal décor can instantly elevate your home’s curb appeal and create a delightful first impression. This guide explores creative ideas, DIY projects, and organizational solutions to help you craft a stunning and functional entryway throughout the year, adapting to the unique aesthetic of each season.
We’ll delve into specific design concepts for each season, offering practical tips on incorporating natural elements, lighting, and textures to maximize impact. Learn how to create DIY decorations, such as wreaths and garlands, and discover clever storage solutions to keep your entryway organized and clutter-free. Whether you prefer a modern, rustic, or farmhouse style, this guide provides inspiration and practical advice to create an entryway that’s both beautiful and functional.
DIY Entryway Decorations

Creating seasonal entryway decorations is a delightful way to personalize your home and welcome guests. DIY projects offer a unique opportunity to express creativity and tailor the décor to your specific style and preferences, often at a lower cost than store-bought items. This section will guide you through the creation of several seasonal decorations.
Fall-Themed Wreath using Natural Materials
Crafting a fall wreath using natural materials offers a rustic and charming touch to your entryway. This project utilizes readily available items found in nature, resulting in a unique and eco-friendly decoration. The following steps will guide you through the process.
- Gather Materials: You will need a sturdy wire wreath form (approximately 12-14 inches in diameter), various types of fall leaves (oak, maple, etc.), small twigs, berries (such as rosehips or crabapples), floral wire or twine, and pruning shears.
- Prepare the Leaves and Twigs: Carefully gather your leaves and twigs, ensuring they are clean and free of debris. Trim any excess stems or branches to create a more manageable size for arranging on the wreath. The leaves should be relatively dry to prevent wilting.
- Attaching the Materials: Begin by securing the larger leaves and twigs to the wreath form using floral wire or twine. Overlapping the leaves and twigs will create a fuller look. Arrange them strategically, creating a natural and balanced design. Consider varying the leaf types and sizes for visual interest.
- Adding Berries and Accents: Once the base layer of leaves and twigs is complete, add the berries by carefully wiring them onto the wreath. You can cluster them together or space them out depending on your preferred aesthetic. Consider adding other natural elements such as pine cones or seed pods for additional texture and visual appeal.
- Finishing Touches: Step back and assess the wreath from various angles. Adjust the placement of leaves and berries as needed to ensure a balanced and visually appealing design. Trim any excess wire or twine and ensure all elements are securely attached.
Imagine a wreath with deep red maple leaves intertwined with golden oak leaves, accented by clusters of bright red berries and punctuated by the texture of a few carefully placed pine cones. The finished wreath would exude a warm, autumnal glow.
Spring Garland using Paper Flowers and Ribbons
A spring garland made from paper flowers and ribbons offers a vibrant and cheerful addition to your entryway. This project allows for creative freedom in color and design, easily customizable to match your personal style and existing décor.
- Materials Needed: You will need colorful construction paper or tissue paper, scissors, glue, ribbon (various widths and colors), and a length of twine or fishing line for hanging the garland.
- Creating Paper Flowers: Cut out various shapes and sizes of flower petals from the paper. Experiment with different shapes and layering to create realistic or stylized flowers. Use glue to assemble the petals into flower shapes. Allow the glue to dry completely before proceeding.
- Assembling the Garland: Cut the ribbon into various lengths and tie them to the twine or fishing line, creating a base for the paper flowers. Attach the paper flowers to the ribbons using glue or small pins. Space the flowers evenly along the garland. Consider adding small leaves or other paper cutouts for additional visual interest.
- Finishing Touches: Once all the flowers and ribbons are attached, adjust the spacing and positioning of the elements until you are satisfied with the overall look. The finished garland should be balanced and visually appealing.
The finished product could be a delightful cascade of pastel-colored paper flowers interspersed with ribbons of varying shades, creating a light and airy feel perfect for springtime.
Seasonal Welcome Mat Methods
Creating a seasonal welcome mat offers a simple yet effective way to enhance your entryway’s aesthetic appeal. Here are three different methods for crafting such a mat.
- Method 1: Fabric Stenciling: This method involves using a plain fabric doormat (such as burlap or canvas) and fabric paint to create a seasonal design. Use stencils to apply your design and allow the paint to dry completely. This allows for intricate designs and offers a durable, washable option. Consider using seasonal shapes or words like pumpkins for fall or flowers for spring.
- Method 2: Upcycled Materials: This method uses readily available materials like bottle caps, pebbles, or even old buttons to create a mosaic-style welcome mat. Use a sturdy backing (like a piece of plywood or a stiff piece of cardboard) and strong adhesive to attach the materials, creating a seasonal pattern. For fall, you might use orange and brown bottle caps arranged in a leaf pattern; for spring, bright-colored pebbles could form a floral design.
- Method 3: Painted Coir Mat: This method involves directly painting a seasonal design onto a coir doormat. Coir mats have a natural texture that readily accepts paint. Use exterior-grade paint to ensure the design lasts. You can use stencils or freehand paint simple designs. For example, a simple pumpkin design for fall or a spring flower design would be easy to create.
Entryway Storage and Organization Solutions
A well-organized entryway sets the tone for the entire home, promoting a sense of calm and efficiency. Effective storage solutions are crucial for managing the daily influx of shoes, coats, keys, and mail, especially during seasonal changes. This section explores practical and aesthetically pleasing ways to maximize space and maintain order in your entryway.
Creative Storage Solutions for Shoes and Coats
Addressing seasonal storage needs requires adaptable solutions. The following options offer diverse storage possibilities to accommodate varying quantities of footwear and outerwear throughout the year.
- Over-the-Door Shoe Organizer: A simple yet effective solution, particularly for smaller entryways. These organizers hang on the back of the door, utilizing often-wasted space. They typically feature multiple pockets, accommodating various shoe types and even small accessories. Seasonal items can be easily swapped in and out.
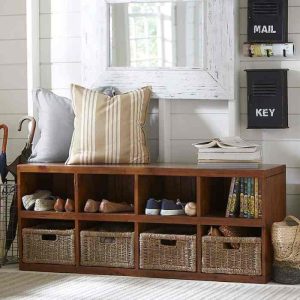
- Bench with Built-in Storage: A stylish and functional piece, offering seating while concealing shoes and other items in drawers or compartments underneath. Larger benches can accommodate bulky winter coats and boots, while smaller ones are suitable for apartments or smaller homes. Choose a bench material that complements your entryway’s style.
- Freestanding Coat Rack with Shelf: A versatile option that combines coat storage with a shelf for hats, gloves, or bags. Choose a rack with multiple hooks to accommodate multiple coats and jackets, and consider a shelf that is deep enough to hold seasonal accessories.
- Under-Stair Storage: If your entryway incorporates a staircase, the space underneath presents an often-overlooked storage opportunity. Custom-built drawers or shelves can be installed to maximize this vertical space, perfect for storing out-of-season items like boots or bulky sweaters.
- Wall-Mounted Hooks and Shelves: A minimalist approach, ideal for smaller entryways or those who prefer a clean, uncluttered look. Strategically placed hooks can accommodate coats and bags, while shelves provide space for smaller items. Consider using decorative hooks to add a personal touch.
Maximizing Space in a Small Entryway with Multi-Functional Furniture
Small entryways necessitate furniture that serves multiple purposes. Clever design can significantly enhance both functionality and aesthetics.Multi-functional furniture is key to maximizing space in small entryways. For example, a narrow console table with drawers provides a surface for keys and mail while offering storage for shoes or other items. A slim coat rack mounted on the wall conserves floor space while providing ample hanging space for outerwear.
A small, foldable bench can serve as both seating and additional storage when folded. These pieces are designed to be compact and space-saving without sacrificing functionality. Consider a mirror integrated into a storage unit to visually enlarge the space. The mirror would also provide a practical function for a final check before leaving the house.
Organizing Keys, Mail, and Small Items
A well-organized system for keys, mail, and other small items ensures a clutter-free and efficient entryway. The following methods offer visually appealing and functional solutions.
| Method | Materials | Description |
|---|---|---|
| Key Hooks and Mail Organizer | Decorative key hooks, a small wall-mounted mail organizer, a small tray or bowl | Install decorative key hooks near the door for easy access. A small wall-mounted mail organizer keeps mail separate from keys. A small tray or bowl can be used to catch other small items. |
| Floating Shelves with Baskets | Floating shelves, decorative baskets or containers | Install floating shelves to create a visually appealing and functional storage system. Use baskets or containers to organize keys, mail, and other small items. This system allows for easy access while keeping items contained. |
| Console Table with Drawers and Compartments | Console table with drawers and compartments | A console table with drawers and compartments offers ample storage for keys, mail, and other small items. This is a great option for those who prefer a more integrated storage system. |
By thoughtfully incorporating seasonal elements, DIY projects, and efficient storage solutions, you can create an entryway that’s not only visually appealing but also practical and welcoming. Remember, the key is to personalize your space, reflecting your unique style and creating a warm and inviting atmosphere for yourself and your guests. Embrace the changing seasons and let your entryway tell a story of creativity and comfort throughout the year.
Quick FAQs
How can I make my entryway feel more spacious?
Use light colors on walls and floors, incorporate mirrors to reflect light, and choose furniture with clean lines and minimal bulk. Avoid overcrowding the space with too many items.
What are some budget-friendly seasonal entryway decorating ideas?
Repurpose items you already own, utilize natural elements like branches and leaves, and create DIY decorations using affordable materials like paint and fabric scraps.
How do I choose a color palette that complements my home’s style?
Consider the existing color scheme in your home and choose seasonal colors that complement or subtly contrast with it. Online color palette generators can be helpful.
How often should I change my entryway decorations?
The frequency depends on your preference, but changing decorations with each season (spring, summer, fall, winter) is a common approach.