Transforming your entryway into a stylish and welcoming space doesn’t require a hefty budget. This guide offers practical, budget-friendly solutions for creating an entryway that reflects your personal style and maximizes functionality. We’ll explore creative DIY projects, repurposing techniques, and affordable decor ideas to help you achieve the entryway of your dreams without breaking the bank.
From repurposing old crates into storage solutions to utilizing thrifted items for unique wall decor, we’ll cover a range of strategies to enhance both the aesthetic appeal and practicality of your entryway. Learn how to maximize space, utilize light effectively, and select color palettes that create the desired ambiance, all while staying within your budget constraints. This comprehensive guide provides step-by-step instructions and visual inspiration to guide you through the process.
Budget-Friendly Entryway Storage Solutions

Creating a functional and stylish entryway doesn’t require breaking the bank. With a little creativity and resourcefulness, you can transform your entryway into an organized and welcoming space using affordable and repurposed materials. This section explores several budget-friendly storage solutions, comparing their cost-effectiveness and providing step-by-step instructions for one DIY project.
Repurposed Item Storage Solutions
Repurposing existing items is a fantastic way to save money and add unique character to your entryway. The following examples demonstrate how old crates, ladders, and other discarded items can be transformed into stylish and functional storage.
- Crate System: Imagine three vintage wooden crates, varying slightly in size, stacked vertically. The largest crate forms the base, followed by a medium-sized crate, and finally a smaller one on top. Each crate provides separate storage for shoes, keys, or mail. A coat of paint in a complementary color would enhance their appearance. Materials: Three wooden crates (found at flea markets, thrift stores, or online marketplaces), paint (optional), sandpaper.
- Ladder Shelf: An old wooden ladder, leaning against a wall, can be transformed into a charming shelf. Simply add sturdy wooden planks to the rungs, creating shelves for displaying plants, photos, or small decorative items. Secure the planks firmly to the ladder rungs for stability. Materials: Old wooden ladder, wooden planks (cut to fit the ladder rungs), screws, wood glue, sandpaper.
- Repurposed Suitcase Bench: A vintage suitcase, placed horizontally on its side and padded with a foam cushion and fabric, creates a unique bench with built-in storage. The suitcase provides a concealed storage space for gloves, scarves, or other small items. The suitcase should be sturdy enough to support weight. Materials: Sturdy vintage suitcase, foam padding, fabric for upholstery, staples or heavy-duty glue, sewing machine (optional).
Cost-Effectiveness of Inexpensive Shelving Units
Selecting the right shelving unit is crucial for maximizing storage while staying within your budget. The following compares three types of inexpensive shelving options commonly available:
| Shelving Type | Cost | Pros | Cons |
|---|---|---|---|
| Wire Shelving | Low | Easy to assemble, lightweight, versatile | Can look less aesthetically pleasing, may not be as durable |
| Particleboard Shelving | Moderate | More aesthetically pleasing than wire shelving, relatively inexpensive | Can be less durable than other options, susceptible to damage from moisture |
| Wooden Shelving (e.g., Pine) | Higher (but still relatively inexpensive compared to custom-built) | Durable, aesthetically pleasing, can be painted or stained | Requires more assembly time, may be heavier |
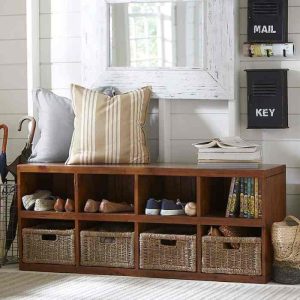
Building a Simple Entryway Bench
A simple entryway bench provides both seating and storage. This step-by-step guide utilizes readily available materials from a home improvement store:
- Gather Materials: Two 2x4s (cut to desired length for bench legs), one 1×6 (cut to desired length for bench seat), wood screws, wood glue, sandpaper, stain or paint (optional).
- Assemble the Legs: Attach the legs (2x4s) to the seat board (1×6) using wood glue and screws, creating a sturdy rectangular frame. Ensure the legs are positioned evenly and securely.
- Sand and Finish: Sand down any rough edges or imperfections. Apply stain or paint for a desired finish. Allow to dry completely.
- Add Optional Storage: A shallow storage container or basket can be placed underneath the bench for additional storage.
DIY Entryway Projects
Transforming your entryway into a stylish and functional space doesn’t require a hefty budget. With a little creativity and some readily available materials, you can create unique and personalized features that add character and charm. This section explores several DIY projects to enhance your entryway’s aesthetic appeal and practicality.
Unique Entryway Rug from Fabric Scraps
Creating a custom rug from fabric scraps is a budget-friendly and eco-conscious way to add a pop of color and texture to your entryway. This project allows for complete creative freedom, enabling you to tailor the design and size to perfectly complement your existing décor.First, gather your materials: a variety of fabric scraps in coordinating colors and patterns (cotton, denim, or even old t-shirts work well), a sturdy backing fabric (canvas or burlap), strong thread, scissors, a sewing machine (optional, but highly recommended), and fabric glue.Next, cut your fabric scraps into roughly square or rectangular pieces, varying the sizes for a more interesting texture.
Arrange the pieces on the backing fabric to create your desired pattern. Experiment with different layouts until you achieve a pleasing aesthetic. Remember to leave a few inches of extra backing fabric around the edges.Once you’re satisfied with the arrangement, begin sewing or gluing the fabric pieces to the backing. If using a sewing machine, sew along the edges of each fabric piece to secure it to the backing.
If gluing, use a generous amount of fabric glue and allow it to dry completely before proceeding. For added durability, you can add a second layer of backing fabric to the underside. Finally, trim any excess backing fabric, leaving a clean edge.
Inexpensive Entryway Lighting Fixtures
Appropriate lighting can dramatically enhance the atmosphere of your entryway. These three lighting options offer different styles and levels of complexity, all while staying within a budget.
Mason Jar Pendant Light
Imagine a rustic-chic pendant light crafted from repurposed mason jars. Gather clean mason jars (various sizes add visual interest), battery-operated fairy lights or LED string lights, twine or jute rope, and a drill (with a bit slightly smaller than the diameter of your twine/rope).Drill holes near the top of each jar to thread the twine or rope through. String the lights inside the jars, ensuring the wires are neatly tucked away.
Then, tie the twine or rope securely to create a hanging fixture. You can adjust the length of the rope to suit your ceiling height. This creates a charming and softly lit entryway.
Repurposed Can Lantern
Transform empty tin cans into stylish lanterns. Clean and dry several tin cans (soup cans, coffee cans, etc.). Use a hammer and nail (or a specialized tool for metal) to carefully punch holes in various patterns on the cans, creating a unique design. Insert a battery-operated tea light or LED candle inside for a warm and inviting glow.
Wine Bottle Wall Sconces
Clean and empty wine bottles (different colors and shapes add character) can be turned into unique wall sconces. Carefully remove the labels. Insert battery-operated tea lights or small LED candles inside the bottles. Securely mount the bottles to the wall using strong adhesive or small brackets. This creates a sophisticated and minimalist lighting solution.
Decorative Hooks from Recycled Materials
Recycled materials provide an abundance of options for crafting stylish and functional entryway hooks. These examples demonstrate the versatility of readily available materials.
Wooden Scrap Hooks
Gather small, sturdy pieces of wood (scraps from old furniture or pallets work well), strong screws, and sandpaper. Cut the wood into desired shapes and sizes for your hooks. Sand the edges smooth. Drill pilot holes and screw the hooks into a sturdy backing board. This creates a rustic and charming hook rack.
Consider adding a coat of paint or stain to enhance the aesthetic appeal. Visualize simple, slightly curved pieces of wood, each with a single screw at the top for hanging, creating a row of elegant, rustic hooks.
Coat Hanger Hooks
Transform old wire coat hangers into unique hooks. Straighten the coat hangers carefully. Bend the wire into desired shapes, such as simple hooks, or more intricate designs. You can add beads or other decorative elements to personalize them further. Attach the hooks to a backing board using strong adhesive or small screws.
This provides a minimalist and modern look. Imagine a series of S-shaped hooks, each elegantly curved and meticulously arranged on a backing board.
Maximizing Space and Light in a Small Entryway
A small entryway doesn’t have to feel cramped. With clever design choices, you can create a welcoming and functional space that maximizes both space and light, even in the most compact areas. By focusing on strategic storage, thoughtful lighting, and the strategic use of reflective surfaces, you can transform a small entryway into a bright and airy focal point of your home.
Space Maximization Strategies for Small Entryways
Effective space management in a small entryway involves utilizing vertical space, employing multi-functional furniture, and minimizing clutter. These strategies ensure your entryway remains both stylish and practical.
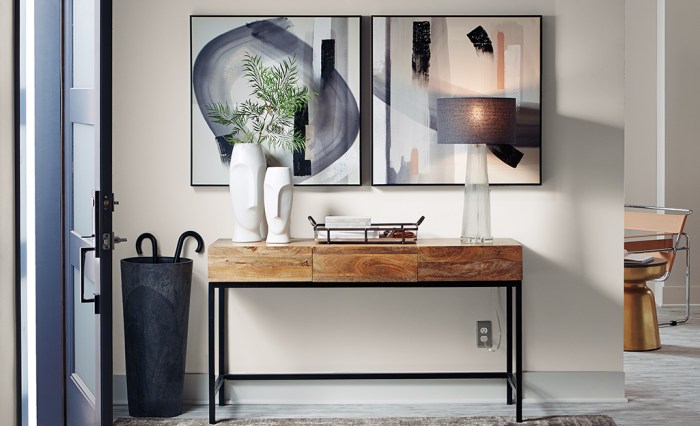
- Vertical Storage Solutions: Instead of sprawling horizontal storage, utilize the vertical space. Imagine a tall, narrow console table with drawers and shelves reaching towards the ceiling. This provides ample storage without taking up valuable floor space. The visual effect is also streamlined and elegant, preventing the entryway from feeling overwhelmed. A tall, slim mirror affixed to the wall above the console table further enhances the verticality and adds a sense of spaciousness.
- Multi-Functional Furniture: Opt for furniture that serves multiple purposes. A bench with built-in storage, for instance, provides seating while concealing shoes, scarves, or other items. Visualize a sleek, upholstered bench with a hinged seat revealing a compartment for storage underneath. The bench can also serve as a landing spot for keys and bags, keeping the entryway organized and clutter-free.
Alternatively, consider a coat rack that doubles as a decorative element, offering both functionality and visual appeal.
- Minimalist Approach to Decor: Avoid overcrowding the space with too many decorative items. Choose a few key pieces that add personality without cluttering the entryway. A small, stylish vase with a single flower, a framed print, or a decorative bowl can add personality without compromising space. Keep the color palette light and airy to enhance the sense of spaciousness. For example, a light grey or beige wall color paired with white furniture and light-colored accessories can create a bright and airy atmosphere.
Lighting Techniques for Expanding a Small Entryway
Strategic lighting is crucial for creating the illusion of more space in a small entryway. By using a combination of ambient, task, and accent lighting, you can dramatically improve the feeling of spaciousness and brighten the area.
- Ambient Lighting: Install recessed lighting in the ceiling to provide overall illumination. This distributes light evenly across the entryway, preventing dark corners and creating a sense of openness. Imagine soft, warm-toned recessed lights that cast a gentle glow throughout the space. Alternatively, a semi-flush mount ceiling fixture can also provide effective ambient lighting while maintaining a low profile.
- Task Lighting: Incorporate task lighting near specific areas, such as a reading nook or a shoe storage area. A small, adjustable wall sconce near the bench provides focused light for reading or putting on shoes. This prevents the need for overhead lighting and maintains a more intimate atmosphere. A stylish table lamp on the console table can also serve as a task light, providing both functionality and visual interest.
- Accent Lighting: Use accent lighting to highlight architectural features or decorative elements. A strategically placed picture light above a piece of artwork or a small spotlight illuminating a plant can draw the eye upwards and add depth to the space. This creates visual interest and distracts from the limited square footage. The interplay of light and shadow can make the entryway appear larger and more dynamic.
Using Mirrors and Reflective Surfaces to Enhance Space and Light
Mirrors are invaluable tools for maximizing both light and the perceived size of a small entryway. By strategically placing mirrors, you can create the illusion of a much larger space.
- Large Mirrors: A large mirror placed opposite the entryway door can significantly enhance the feeling of spaciousness. Imagine a full-length mirror on the wall, reflecting the light and creating a sense of depth. The reflected light brightens the entryway and makes it feel less confined. This simple trick can make a dramatic difference in the overall appearance of the space.
- Strategically Placed Smaller Mirrors: Smaller mirrors can be strategically placed to reflect light from other sources. A small mirror positioned to reflect light from a window can brighten a dark corner. For example, a small, decorative mirror placed above a console table can reflect light from a nearby lamp or window, creating a brighter and more welcoming atmosphere. This technique is particularly effective in entryways with limited natural light.
- Reflective Surfaces: Incorporate other reflective surfaces, such as metallic accents or glossy furniture, to enhance the effect of the mirrors. A metallic console table or a set of glossy ceramic tiles on the floor can reflect light and create a brighter, more spacious feeling. This approach creates a cohesive and visually appealing design that maximizes both light and space.
By implementing the creative and cost-effective strategies Artikeld in this guide, you can easily create a beautiful and functional entryway that reflects your personal style without exceeding your budget. Remember, the key lies in resourceful repurposing, clever DIY projects, and thoughtful selection of affordable decor elements. With a little creativity and planning, your entryway can become a stunning and inviting focal point of your home.
Clarifying Questions
Can I use existing furniture in my entryway decor?
Absolutely! Repurposing existing furniture pieces is a great way to save money. A simple coat of paint or new hardware can completely transform an old piece.
Where can I find affordable decor items?
Thrift stores, flea markets, and online marketplaces are excellent resources for finding affordable and unique decor items. Check out garage sales in your neighborhood as well.
How important is lighting in an entryway?
Lighting is crucial! It sets the mood and can make a small entryway feel larger. Consider a combination of ambient, task, and accent lighting.
What if I don’t have DIY skills?
Many of the ideas presented can be adapted to suit different skill levels. Focus on simpler projects to start, and don’t be afraid to ask for help from friends or family.